- Open:Weekdays: 8:30 am – 5:30 pm, Saturdays: 9:00 am-2:00 pm
- Email: info@youdrugmart.com
- Follow:
-

-


Using a contour blood glucose meter provides remarkable accuracy and peace of mind when managing diabetes, and learning how to use contour blood glucose meter devices correctly ensures that every reading reflects your true blood sugar status. Whether your physician prescribed the classic meter or the updated Bluetooth-enabled Contour Next One, establishing a proper testing routine will help you make confident health decisions. Therefore, in this guide, we will break down what these devices do. Additionally, we will walk through the step-by-step instructions on how to use the device, compare top products, and answer your most frequent testing questions.
A contour blood glucose meter is a compact, highly precise electronic device designed to measure quantitative glucose levels in capillary whole blood. Manufactured by Ascensia Diabetes Care, these meters use proprietary test strip technology to deliver fast, clinical-grade results in about five seconds.
Important Features | Key Patient Benefit |
| SmartLIGHT® Target Range | Provides instant color-coded visual feedback on reading status. |
| Second-Chance® Sampling | Allows re-applying blood to the same strip, preventing wasted supplies. |
| No Coding® Technology | Eliminates manual setup steps and reduces human error. |
| Microlet® Lancing Device | Ensures gentle, customizable depth control for fingertip testing. |
Because accurate readings directly impact insulin dosing and meal planning, healthcare providers frequently prescribe the contour blood glucose meter for daily diabetes self-management. Furthermore, modern models require no manual coding, which eliminates setup errors and simplifies testing for users of all ages.
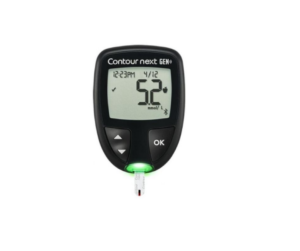
Knowing how to use the equipment properly eliminates testing errors and guarantees precise readings every time. Before beginning, gather the device, matching test strips, Microlet lancing device, fresh lancet, and an alcohol swab.
Steps | Action | Practical Guidance |
| 1 | Prepare Your Hands | Wash thoroughly with warm, soapy water and dry completely. |
| 2 | Insert Test Strip | Slide a fresh test strip into the test strip port; the meter powers on automatically. |
| 3 | Prepare Lancing Device | Load a new lancet into your lancing device and adjust the puncture depth. |
| 4 | Obtain Blood Drop | Prick the side of your fingertip and gently squeeze to form a small drop. |
| 5 | Apply Sample | Touch the tip of the test strip to the blood drop until the meter beeps. |
| 6 | Read & Record | View your numeric reading on the screen after the 5-second countdown. |
While using the systems, remember that washing your hands with warm water serves a dual purpose. It removes lingering sugars from food while simultaneously boosting blood flow to your fingertips. If your first attempt yields an insufficient blood drop, Second-Chance® sampling allows you to apply more blood to the exact same strip within 60 seconds. This also prevents strip wastage.
| Feature & Specification | Standard Contour Meter | Contour Next One Meter |
| Design & Display: | Traditional LCD screen with clean text | Slim, pen-style ergonomic design |
| Test Strip Requirement: | Original Contour Test Strips | Contour Next Test Strips |
| System Accuracy: | ISO standard clinical accuracy | Extended ±5.3% lab-level accuracy |
| Connectivity: | Standalone on-device logbook | Wireless Bluetooth app syncing |
| Visual Target Indicator: | Text/Icon screen prompts | Instant SmartLIGHT® target range light |
| Re-Sampling Window: | Standard single testing | 60-Second Second-Chance® countdown |
The standard contour blood glucose meter relies on traditional Contour test strips and provides a clear, high-contrast digital display for straightforward daily checks. Conversely, the Contour Next One features a sleek, pen-like design and utilizes Contour Next test strips, which offer tighter accuracy standards within ±5.3% of laboratory reference values. Additionally, the Contour Next One connects via Bluetooth to the Contour Diabetes app, automatically syncing your readings to your smartphone. Additionally, it shows an instant color-coded SmartLIGHT® feedback on your blood sugar status.
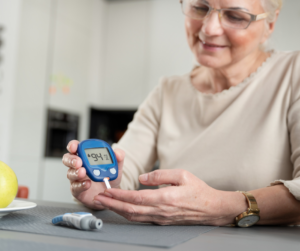
To maintain the accuracy of your device, proper storage and routine care remain essential. Environmental factors like extreme heat, freezing temperatures, and heavy moisture can damage the internal optics of your this device or ruin sensitive test strips.
To summarize, primary maintenance tips include:
Conclusion
In conclusion, mastering how to use contour blood glucose meter equipment is one of the most effective steps you can take toward successful diabetes management. By keeping your testing supplies clean, following proper fingertip sampling steps, and leveraging features like Second-Chance® sampling, you ensure that every blood sugar check is smooth and reliable. Whether you choose the reliable standard device or upgrade to the connected Contour Next One, consistent daily testing empowers you and your healthcare team to keep your health on track.
A contour blood glucose meter is a compact, highly precise electronic device designed to measure quantitative glucose levels in capillary whole blood. Manufactured by Ascensia Diabetes Care, these meters use proprietary test strip technology to deliver fast, clinical‑grade results in about five seconds.
To use the meter, gather the device, matching test strips, a Microlet lancing device, a fresh lancet, and an alcohol swab. Prepare your hands by washing with warm, soapy water and drying completely. Insert a test strip into the meter, which powers on automatically. Load a new lancet into the lancing device and adjust the puncture depth. Prick the side of your fingertip and form a small blood drop, then apply the sample by touching the tip of the test strip to the blood drop until the meter beeps and begins a short countdown. Read the numeric result on the screen after the countdown and record it.
The standard Contour meter uses traditional Contour test strips and has a traditional LCD display with clear text, offering ISO standard clinical accuracy. The Contour Next One features a slim, pen‑style design with Contour Next test strips, tighter accuracy within ±5.3% of laboratory reference values, Bluetooth connectivity to the Contour Diabetes app, and instant colored SmartLIGHT feedback on your blood sugar status.
Maintain accuracy by storing the meter and test strips at room temperature between 41°F and 86°F (5°C to 30°C), keeping strip vials sealed, and cleaning the exterior with a lint‑free cloth dampened with mild soapy water. Perform control solution tests when opening a new box of strips, after dropping the device, or if readings do not match symptoms.
If the first attempt yields an insufficient blood drop, use Second‑Chance® sampling to apply more blood to the same strip within 60 seconds, preventing strip wastage and allowing a valid reading.

